Working with a grid in Photoshop. How to make a grid in Photoshop
Let's look at the auxiliary tools that are used to create and edit images in the program Adobe Photoshop CS5. These are rulers, guides and a grid.
Rulers in Photoshop
Rulers can be seen on the left and top outside the image borders. Rulers are turned on and off using the menu View - Rulers.
The ruler's measurement units can be changed in the settings. To change, go to Editor - Settings - Units of measurement and rulers, and choose what you need in the top item.
The default reference point for rulers is the top corner. You can change the starting point if you click on the intersection of the rulers with the left mouse button and drag it onto the drawing. to the place where you plan the origin of coordinates. Then release the mouse button.
To return the starting point to its place, double-click at the intersection of the rulers.
Guides in Photoshop
 Guides are lines to which you can snap certain objects and selections. To create guides, left-click on the ruler and, without releasing it, drag while clicking on the drawing. A guide appears that will be parallel to this ruler. Using rulers, you can accurately position the guides in the drawing, at a predetermined distance from the edge.
 For example, you want to select a round or oval object. To do this, make four guides: two horizontal and two vertical, in order to limit the desired object with them. After that, choose a tool oval area, and diagonally from the first intersection of the guides to the second intersection, make a selection. The selection will stick exactly to the guides.
Once selected, you can do whatever you want with the selected area, for example, make it more contrasting, or brighter, or change the color.
To move an existing guide, press and hold Ctrl, and move the guide to a new location. You can also use the tool Moving.
When installing guides in Photoshop, to make them more precise, use zoom in.
Snapping of objects and selections to guides can be disabled or enabled using the menu View - Link. You can also select different anchor elements using the selection View - Snap to. At this point you can snap to guides, grid lines, layers, document borders.
To remove guides, go to the menu View - Delete Guides. You can also remove guides by dragging them outside the image.
In addition, a new guide in Photoshop can be created using the menu View - New guide. When creating, a dialog box appears in which you select the guide's orientation and position. This method is good when you know exactly where the guide should be.
You can also change the orientation of the guide, from vertical to horizontal, or vice versa. To do this, press and hold the key Alt, then click on the guide in the place where you expect it to rotate 90 degrees.
Grid in Photoshop
The grid is another useful tool in Photoshop for creating collages, montages, and other cases where you need precise placement of objects.
 In order for the grid to appear, select from the menu View - Show - Grid. The grid size is adjustable in the settings Adobe programs Photoshop CS5. To go to settings. choose from the menu Editing - Settings - Guides, grid and fragments. In the settings you can specify. how often the grid lines will be placed, using the points Line through every, and internal division by,
which regulate the frequency of the main and auxiliary grid lines.
In order for the grid to appear, select from the menu View - Show - Grid. The grid size is adjustable in the settings Adobe programs Photoshop CS5. To go to settings. choose from the menu Editing - Settings - Guides, grid and fragments. In the settings you can specify. how often the grid lines will be placed, using the points Line through every, and internal division by,
which regulate the frequency of the main and auxiliary grid lines.
Now, if you pull the guide out of the ruler, it will automatically stick to the grid lines. If you create a selection, it will also snap to the lines and nodes of the grid. Linking can be disabled using the menu View - Snap To - Grid Lines.
To remove the grid, go to View - Show, and uncheck the box Net.
There is a tool that will make editing graphics much easier. This is a grid. It helps in creating images and putting together collages. Using it you can estimate the size and distance, estimate how objects will be located relative to each other, and make markings. Find out where to place this or that part of the drawing. This is a useful tool if you know how to use it. Learn how to enable the grid in Photoshop, how to adjust its attributes, and how to remove it.
The grid helps you arrange elements in a composition more accurately and symmetrically.
Essentially, these are guide lines. Level table. It overlays the image, but does not cover it. It makes it easier to calculate proportions, see symmetry, and place individual elements correctly.
As an analogy, let's take a school notebook in a cage. They built graphs and drew geometric figures in it. On such a sheet it was possible to draw a straight line without a ruler, set an angle of 45 or 90 degrees, without using a protractor. It was used to determine by eye how long the side of the rectangle was and how many cells made up its area. In Photoshop, a table has approximately the same functions.
It can only be seen in the program. It will not appear when printed. In the digital version there will be no pattern of cells either. This is not a part of the image, but an editing tool.
It should not be confused with the pixel grid. The last thing is breaking the picture into points. Useful for detailed editing. It can also be enabled and configured.
Even if you don't need these options, it will still be useful to know about them. For example, to remove a table if it was accidentally activated.
How to turn it on?
- Open any graphic file or create a new one.
- In the menu bar, click on the “View” button. Usually it is between "3D" and "Window".
- Hover your cursor over “Show”.
- In the drop-down menu, click on “Grid”. It will appear on the layer.
- You can also press the keys Ctrl+’ (in the Russian layout Ctrl+E).
How to setup?
You can make the cells a different size (for example, so that they visually indicate segments 1 centimeter long), choose the type or color of the lines.
- Open the "Edit" menu on the top panel.
- Hover your mouse over “Settings”. He's at the very bottom of the list.
- Click on Guides, Grid and Slices.
- In the window that opens, set the desired cell size. This can be done in the “Line every...” field. Available different units measurements: inches, millimeters, points and so on.
- In the "Style" section, specify how you want the grid to be displayed: solid, dotted, or dotted. This is not so important, since the markup will only be visible when editing the picture.
- Under Color, select a fill. This setting can be used when the table blends into the background.
How to remove?
You can get rid of cells in the same menu through which they were added. Here's how to remove the grid in Photoshop:
- Go to View - Show.
- Uncheck the corresponding item.
- Or use the keyboard shortcut Ctrl+E.
Pixel grid
The pixel grid is only noticeable up close. To see it, you need to enlarge the picture and change the scale. But when working with graphics, it can interfere. Here's how to insert or remove it:
- Open the menu View - Show.
- Click on "Pixel Grid".
Rulers
Another measurement method in Photoshop is rulers. They are located outside the picture. With this tool you can estimate the length and width of objects and the image as a whole. You can activate rulers in the View menu. To select their parameters, go to Editing - Settings - Units and Rulers.

The table is useful when drawing diagrams. Or for any other job that requires precision. But this tool is also useful outside the professional sphere. After all, when drawing, a lot of things are “pretended by the eye.” If you turn on the markup, you can navigate by it. And in the end you will get a verified, elaborate and beautiful drawing.
If you make a mistake, you can always use the "History" function.
Sources:
- How to make a calendar in Photoshop
There are many artistic photography techniques that allow you to get unusual visuals. effects. One of them is “fishy” eye" It is achieved by using a wide-angle lens at short focal lengths. Therefore, it cannot be reproduced on amateur cameras. However, to create a fisheye effect eye» can be done in Adobe Photoshop editor from a regular photograph.

You will need
- - installed Adobe Photoshop;
- - image file.
Instructions
Open the original image in Adobe Photoshop by selecting "Open..." from the File menu. Using the text field located at the bottom of the document window or the Zoom Tool, set the appropriate viewing scale. It should allow manipulation of the entire image area intended for processing.

Create a main layer from the background one. In the main menu, select Layer, New, "Layer From Background...". Click on the OK button in the Layer dialog that appears.

Select the area of the image to which you want to apply the fisheye effect. eye" Use the Rectangular Marquee Tool or Elliptical Marquee Tool. If the entire image must be processed, skip this step.

Activate image processing mode using distortion. From the menu, select Edit, Transform and Warp. After this, a grid will appear in the document window to control the effect parameters.

Change the distortion type applied to fishfish eye" Click on the Warp drop-down list located in the top toolbar. Select the Fisheye element. The control grid in the document window will change its appearance (only one marker will remain).

Apply a fish effect eye» to the processed image. Move the control grid marker with the mouse until the desired level of distortion is achieved.

If you need to make additional changes to the image, for example, give the distortion area a rounded shape, select Custom from the Warp list. Move the grid nodes to achieve the desired effect. Apply the changes made by clicking on any toolbar button and clicking OK in the dialog that appears.

If necessary, modify the image with a fisheye effect. eye A". For example, invert the current selection by pressing Ctrl+I, clear the background by pressing Del, and then fill it in the right color using the Paint Bucket Tool. Crop with the Crop Tool.

Save the result of your work to a file. Use the item "Save As..." or " Save for Web & Devices..." in the File section of the main menu. When saving, pay special attention to the choice of format and degree of data compression. If you intend to work with the image further, save a copy of it in PSD format.

Professional raster graphics editors, such as Adobe Photoshop, provide powerful photo editing tools today. The effects created go beyond the usual reality. For example, in photoshop can be done fangs, presenting the character of the photographic composition in the form of a vampire.
The grid is a convenient tool that allows you to easily and quickly track changes occurring in the image you are working with. graphic editor. In this article, you will learn how to create a grid in Photoshop for any image so that it shows even the slightest distortion in your work.
You will need
- Adobe Photoshop
Instructions
1. To create a mesh, go to the View Options section and select Show Mesh in the view settings. Please indicate the required size and color. After confirming the command, a grid with the specified parameters will appear on your open image.
2. The grid, if necessary, can be saved. To do this, click “Save grid” or “Load grid”, if you need to open an existing one.
3. The mesh can be of great help in reconstructing an image after some manipulation has been done on it and it turns out to be distorted. Open the “Reconstruct” tool, it will allow you to cancel the metamorphoses, restore the original appearance of the image, or, on the contrary, apply distortion to other objects. In addition, the Liquify section can distort the object. The mesh will allow you to track metamorphoses and distortions in any created object, and you can also save the mesh with the shape of the transformed object at any time, so that you can later apply it to it. It’s also true that you can save the mesh for a typical undistorted object in order to restore its parameters after unsuccessful actions.
4. The grid will be your essential assistant if you work with unclear images in which it is difficult to discern certain boundaries. It will allow you to more accurately notice areas of certain changes. In addition, if you uncheck the “Show image” option in the grid settings, you will be able to see the distortions on the grid in their pure form.
This lesson will give you an idea of how you can create your own customized calendar in Photoshop. We will not go into the details of making collages, but will only describe the main stages of the work. So, let's get started.

You will need
- computer;
- photoshop any version;
- fantasy.
Instructions
1. For the calendar, we need a grid, which can be downloaded on the Internet upon request. Next, open the new document by pressing Ctrl+N. In the “Set” section, we prefer A4 paper format with a white background color.
2. On the document, call up the “Ruler” (Ctrl + R) and mark the lines. We will be guided by them when placing images, and at the end of our work, along these lines it will be easy for us to bend a sheet of paper to make a calendar. Go to “View” -> “New Guide” and select the “Orientation” -> “Horizontal” option in the new window. Enter 50% in “Location” and confirm.
3. Now we will make a new guide 9 cm from the first one. Take the “Ruler” tool and uncheck the “Apply measurement scale” checkbox. Drag the line down from the guide, align it, getting rid of kinks. Next, hold down Ctrl and drag out to the edge of the stretched line using the Ruler tool. We do the same in the direction opposite to the center line.
4. Let's make two pictures, one for each side of our calendar. Using “Free Transformation”, by pressing Ctrl+T, place a pattern on the document, then apply “ Rectangular area"and allocate a place for the drawing. Invert the selection (Ctrl+I) and press Del. You can adjust the layer a little by applying a blur to it.
5. We take the second picture and place it on the other side of the document. If necessary, use Free Transform to reflect or reduce the image.
6. Now you can arrange the calendar grid. So that it is not too small to read, we will place half the year on one side, and the second half on the 2nd side. Using the “Text” tool, we type the year. You can immediately enlarge the font, change the opacity or color, or change the location. We make a frame around the edges for beauty.
7. Move to the second side, rotate the canvas 90° clockwise 2 times. Just don’t reflect it vertically; on the contrary, we’ll get mirror reflection. We do the same with the grid: place the second image, text and grid, design it perfectly.
8. Finally, you can hide the guides and start printing. For printing, select A4 format and check the “True size” checkbox. This is very important. If we don’t check the box, we may not have enough space for the calendar to fit onto A4 sheet. This is all.
Video on the topic
Note!
Be careful not to work on the Background layer, because some of the metamorphoses on it may be irreversible. It is always better to insure yourself with a new layer.
Helpful advice
If you make a mistake, you can always use the “History” function.
There are a lot of artistic photography techniques that allow you to get strange visual effects. One of them is “fishy” eye" It is achieved by using a wide-angle lens at short focal lengths. Consequently, it cannot be reproduced on amateur cameras. However, to make the result “fishy” eye» is allowed in the Adobe Photoshop editor from an ordinary photograph.

You will need
- – installed by Adobe Photoshop;
- – image file.
Instructions
1. Open the initial image in Adobe Photoshop, choosing “Open...” from the File menu. Using the text field located at the bottom of the document window or the Zoom Tool, set the appropriate viewing scale. It must allow manipulation of each area of the image prepared for processing.

2. Make a core layer from the background layer. In the main menu, select Layer, New, “Layer From Background...”. Click on the OK button in the Layer dialog that appears.

3. Select the area of the image to which you want to apply the fisheye effect. eye" Use the Rectangular Marquee Tool or Elliptical Marquee Tool. If the entire image must be processed, skip this step.

4. Activate image processing mode using distortion. From the menu, step by step select Edit, Transform and Warp. Later, a grid will appear in the document window to control the parameters of the result.

5. Change the distortion type applied to fishfish eye" Click on the Warp drop-down list located in the top toolbar. Select the Fisheye element. The control grid in the document window will change its appearance (only one marker will remain).

6. Apply the result "fishy" eye» to the processed image. Move the control grid marker with the mouse until the desired distortion level is reached.

7. If you need to introduce additional metamorphoses into the image, say, give the distortion area a rounded shape, select the Custom item in the Warp list. Move the grid nodes to achieve the desired result. Apply the changes made by clicking on any toolbar button and clicking OK in the dialog that appears.

8. If necessary, modify the image with the added fisheye result. eye A". Let's say, invert the current selection by pressing Ctrl+I, clear the background by pressing Del, and then fill it with the desired color using the Paint Bucket Tool. Crop with the Crop Tool.

9. Save the results of your work to a file. Use the “Save As...” or “Save for Web & Devices...” item in the File section of the main menu. When saving, pay special attention to the choice of format and degree of data compression. If you intend to work with the image later, save a copy of it in PSD format.

Highly professional raster graphics editors, such as Adobe Photoshop, today provide powerful tools for the metamorphosis of photographs. The results created go beyond the usual reality. Let's say in photoshop allowed to do fangs, presenting the character of the photographic composition in the form of a vampire.

You will need
- – Adobe Photoshop;
- – a file with a photograph for processing.
Instructions
1. Open the photo you want to take fangs, in Adobe Photoshop. Select “Open...” in the File section of the main menu or press Ctrl+O together. Specify the file in the dialog that appears. Click "Open".

2. Select one of the teeth on which the canine will be formed. Activate the Zoom Tool. Set a viewing scale for this image fragment that is comfortable for work.

3. Make a selection area around the tooth. This can be done comfortably using the Magnetic Lasso Tool or Polygonal Lasso Tool. If necessary, adjust the selection in the quick mask mode or using the items in the Modify section of the Select menu.

4. Copy the tooth image to a new layer (at the same time as creating it). Step by step select the Edit, Copy and Edit, Paste menu items. You can also use the key combinations Ctrl+C and Ctrl+V.

5. Activate image warp mode. Press Ctrl+Shift+D or use the Reselect item in the Selection menu to restore the previous selection area. Step by step select the Edit, Transform and Warp items of the main menu. A grid will appear around the tooth image.

6. Make a fang from a tooth. Move the mesh nodes to achieve the desired shape. After finishing reforming, double-click in the center of the grid or select any tool in the panel and click Apply in the request dialog.

7. Conjugate the images of the transformed and initial teeth located in different layers. Activate the Eraser Tool. By clicking on the Brush control in the top panel, select a brush of the appropriate type, diameter and hardness. Set the Opacity parameter to 10-20%. Using the Eraser Tool, use the Eraser Tool to erase the edges of the top layer image until there are no visible borders between it and the background image.


9. Save the modified image. Press Shift+Ctrl+S or click on the “Save As...” item in the File menu. In the dialog, select the file format and name. Click the "Save" button.

The Liquify filter is one of the most convenient for free image deformation Photoshop tools. Using this filter, you can not only get details to create a surreal collage, but also make the figure in the photo more slender.

You will need
- – Photoshop program;
- - photo.
Instructions
1. Using the Open option of the File menu, open the photo in a graphics editor. Unlock a photo taken on a single-color background without texture, noise and shadowed areas located near the figure you are going to correct using the Layer from Background option in the New group of the Layer menu.
2. A picture with a more difficult background will need different preparation. Using the Lasso tool, select a shape with a small amount of background. Use the Layer via Copy option in the New group to copy the selection to a new layer. When you warp an image using the Liquify filter tools, areas of the background close to the ones you're working with may end up being altered. After finishing the work, you will restore them from the initial image.
3. Use the Liquify option in the Filter menu to open the filter window and check the Show Mesh checkbox. The grid that appears will give you the ability to track the progress of the transformation.
4. Turn on the Pucker Tool and use it to process the parts of the figure that need to be reduced. To do this, adjust the size of the tool's brush so that it matches the width of the body part being changed. Pixels affected by the brush will move to its center, marked with a cross.
5. The degree of displacement of the picture details located on the different distances from the center of the brush. With the maximum value of this parameter, the tool will do the same on all pixels that fall under the brush. By setting the Brush Density to a low value, you will weaken the metamorphosis of the image around the edges of the brush.
6. The Brush Pressure parameter controls the speed at which the image metamorphoses. Set this parameter to a low value in order to be able to monitor the transformation process. Place the center of the brush on the selected part of the shape, hold left button mouse and wait for the desired degree of metamorphosis of the image.
7. To narrow the shape, you may need the Forward Warp Tool, one that shifts the pixels affected by the brush in the direction of its movement. The settings for this tool are similar to those for the Pucker Tool. Adjust the size of the Forward Warp Tool to the length of the segment you want to move, set the center of the brush to the edge of the shape and move the image.
8. Turn off the visibility of the grid. If the correction turns out to be excessive in one area of the photo, restore initial view this fragment using the Reconstruct Tool.
9. To correct the background surrounding the figure, make a mask on the layer to which the filter was applied by clicking on the Add layer mask button. Remove the damaged background by painting it black over a mask using the Brush Tool.
10. Duplicate the layer with the initial image using the Duplicate Layer option of the Layer menu and mask on it the fragments of the figure that appeared from under the layer with the “thinner” image. This can be done with the Clone Stamp Tool.
11. Using the Save As option in the File menu, you can save the edited photo to a jpg file.
Video on the topic
05.02.2017 28.01.2018
Hello to all website visitors
The Photoshop program has an excellent tool that helps you position objects and draw objects with pixel accuracy. given size and so on. This tool is called the Grid. It is often used by web designers, but this tool is so useful that everyone should know about it. If you still don't know what it is Net in Photoshop, how to turn it on and how to use it- This lesson will be very useful for you.
It is worth noting that the Grid is not visible when saving an image in jpg, png, gif formats. Also, the Grid is “invisible” when printing. The grid is only visible in Photoshop itself or if you save the image in PSD or TIFF format. If you save an image in PSD or TIFF format and give the file to someone else, when they open the file on their computer, they will be able to see the Grid you created.
How to turn on/off the Grid
To begin, as always, create a new document in Photoshop (Ctrl + N) with an arbitrary size, for me it is 800x600 pixels:
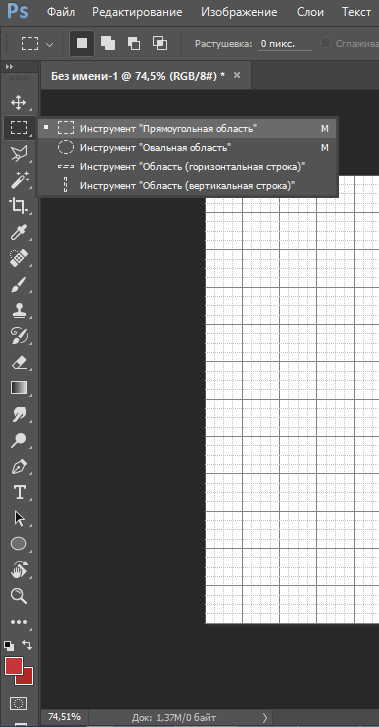
By default, the new document tab will look like this:

In order to enable Grid, you need to go to the menu View - Show - Grid (View - Show - Grid) or press the key combination Ctrl + “(“E” in Russian keyboard layout):

The grid appeared:

By the way, in order to turn off the Grid, you need to do the same steps - go to the View menu and uncheck the “Grid” box or press Ctrl + “ again.
How to set up a Grid
By default, the Grid is divided by thick lines, the distance between which is 2 cm, in turn, these blocks are separated dotted lines into 4 more parts.
You can change these settings to suit your needs by going to the menu Editing - Preferences - Guides, mesh and fragments ( Edit - Preferences - Guides, Grid & Slices) or by pressing the key combination Ctrl+K And Ctrl+8.

The following window will open in which you can change the color settings, Grid units, etc.

How to use the Grid
Let's say we need to cut out a rectangle on a layer to make a frame, leaving 50 pixels around the edges.
Let's change centimeters to pixels and set the step to 50 pixels:

Activate the tool Rectangular selection (Rectangular marquee), hotkey calling the tool - M.
A little tip on using the grid in Photoshop:
When working with the Grid, as well as with Guides and layers, it is advisable to enable the function Binding. When this function is active, the created objects seem to “stick” to the Grid lines (in our case). To make sure the feature is enabled, go to the menu View - Show (View - Show). If the “Binding” checkbox is not enabled, click on this item to check it.


If they have a different appearance, activate the desired item by clicking on it, or click on the “All” item; in the second case, the binding will be activated immediately for all available items:

Back to the lesson
Create a selection using the tool Rectangular selection, retreating 50 pixels from the edges of the image. The sides of the created rectangle “stick” to the Grid lines and do not allow us to go beyond the boundaries.
Sheldon Pinkman
How to quickly and easily create a mesh using Adobe Photoshop?
Let's say I need to draw a grid in Photoshop, each square is the same size and a certain number of pixels in height and width, and the grid lines are a certain width in pixels. Like this:
I'm currently doing this by drawing one square, copying+pasting+moving+combining it multiple times to create one line, copying/pasting it multiple times to create more lines on top of each other.
This works but seems very clunky, I'm sure there should be more effective method do it?
What are some effective methods to create a grid of equal sized squares?
Answers
Alex Blackwood
Try using templates. For your square example:
Draw your initial square and make a selection of a smaller square that only includes the top and left sides. Then select Edit > Define Pattern... and save the pattern with a name.
little tiny person
how to make it so that there are no half cells so that they fit perfectly?
Alex Blackwood
In the above example I used information palette to measure the mesh size. In this case it was 86px. If you want to create a canvas tile without "half cells", use a value that is evenly multiplied by the canvas dimensions.
Dave Munger
Well, I have a layer where I have drawn a selected square and a selection area, but Edit > Define Pattern is a disabled menu item for me. Puzzling.
Helen
If you are trying to create a grid just for your benefit when developing, there is an extension called GuideGuide that will do this efficiently.
If you need a grid to be part of the design, I would recommend creating a line using the selection tool and then duplicating it as many times as you need, then using the Layer >> Distribute options to make them perfectly even.
David Parker
I found quick way solved my problem (I have PS CS4): I used "Show Grid", adjusted size etc in settings, got it exactly how I wanted it and then took a screenshot of the image, pasted it into my file as a new layer , and trim it to size and scale. This won't be enough for some users, but it was very fast and worked for my needs.
Clerric
Below the View tab is a layout of the new guide.
A new Preset window will open - you can save, load and create a guide layout to use again and again, check or uncheck columns or rows depending on your needs. It is recommended to select the Preview checkbox. = Distance between generated guides Gutter = distance between guides Margin = sets the desired margins for your designs, you can enter a value for top, left, bottom and right
center columns and clear existing guides can also be selected
This is for Photoshop CC 2015.5
David
Select photoshop → settings → guides, grids and fragments.
Define the grid as desired
Select view → show → grid; then check additions.
Check view → snap to grid; then check equipment
Turn on the window paths, if it is not already visible. Create a new path called Horizontal.
Use the tool pen(P). Define a horizontal segment at the top of the grid. One click first on the left, then on the right.
Use the tool choosing a path option
Create another new path called vertical.
Use the tool pen(P). Define a vertical grid segment on the left side. One click first from above, then from below.
Use the tool choosing a path(A, black arrow). Click on the path while holding option(Alt) to make copies of the object.
Create a new layer for the mesh (optional). Otherwise, the mesh will be drawn on any active layer.
Window palettes→ Select horizontal path, then select stroke path(using the Foreground color) from the options submenu (click the small triangle with three lines in the top right corner of the palette window), select Brush or Pencil.
Repeat the previous step to circle vertical path.
Evan Carslake
It's a lot of work to make it this way.


