Practice: Camera control via PC. Various useful things for Canon and not only Controlling a canon camera from a computer
In this section, I will post or describe various usefulness.
I'll start, perhaps, with programs to control the camera from a computer. There are quite a few different ones. Here are some of them.
Download
Download
Download
Download
I will give four more programs designed to simplify the process of loading, processing and printing digital photos for documents as much as possible.
Can control the following models:
Canon PowerShot: S60, Pro1, G5, G6, G7, G9, G10, A75, A80, A85, A95, A510, A520, A620, A640, S3iS, S5iS, SX100iS, SX110iS.
Canon EOS SLR: 40D, 1000D, 450D, 500D.
Download
Download
Download
Download
Using a Canon camera as a webcam (see the list of supported models on the manufacturer's website!!!):
Download
Download
Recently, many in the department were cut off access to the Internet and chopped off ICQ. A private conversation with the administrator and the boss did not lead to a consensus. But it was not so bad - there was a car with full access next to it. Proksya will save us, I thought, and began to look. Stopped at two. For ICQ, HTTP-Tunnel v4.4.4 was ideal, I didn’t find a crack, and why - the speed for ICQ is not so important. For the Internet, I installed Etlin HTTP Proxy v1.0.0, I apply a crack (when it asks to register, type something in the fields, or do it immediately after installation). These programs have fairly simple settings, clear interfaces, and work stably. Problem solved.
Download
Download
Download
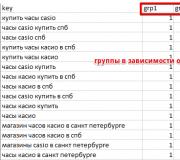
Once I came across the site http://www.detiseti.ru I found a lot of useful things for kids. There are three good example generators: for multiplication and division (two-digit numbers), for remembering the multiplication table and thirds for practicing mental counting. But being very tired of printing, I wrote 2 simple generators for solving examples on a computer: one for addition and subtraction, the second for multiplication and division. Answers are conveniently typed on the numeric keypad and the Enter button next to it. If you find bugs - write to the soap ( [email protected]).
Download
Download
Today I want to talk to you about how shooting from a computer is carried out, to consider in detail what is required for this, and what settings need to be made.
Benefits of shooting from a computer
Before proceeding with the consideration of the process of photography, let's figure out why it is needed at all. When taking product photography, I always connect the camera to the computer via a USB port. As a result, the resulting picture is displayed on a large screen, which is very convenient, as it makes it easier to control the quality of the resulting picture on the fly, as well as conveniently demonstrate the received frames to other participants in photography. At a high magnification (the photograph is much smaller on the camera's liquid crystal display), you can examine the resulting image in detail, evaluate the quality of the exposed lighting and make the right decision about the need to make certain changes. In addition, the pictures taken are directly copied to the computer's hard drive and do not clog the camera's memory card, which saves us from subsequent cleaning.
Do you work on the road and do not have the opportunity to connect the camera to a desktop computer? Perhaps the option to connect the camera to the tablet is suitable for you.
Using this method of shooting, you will not miss small details that you would not notice under normal conditions. The connection scheme is extremely simple: one connector of the USB cable is connected to the computer, and the other to the camera. But for this method of shooting, you will need the appropriate software. If you use a Canon camera, you already have one. Each camera of this company comes with a CD with the EOS Viewer program (it is available completely free of charge on the official website of the company). Users of Nikon cameras will need the Nikon Camera Control Pro software, with which they can save the pictures they have taken on the computer's hard drive, bypassing the camera's memory card. On the official website of the company, you can download a trial version of the program with a 30-day period of operation.
Warning: once you try to take pictures connected to a computer, you will quickly get used to viewing large images, after which it will be difficult for you to return to working with the camera's LCD screen. You get used to good things quickly, don't you?
What is required to connect?
You will need:
- Camera
- A computer
- USB cable
The standard cable for connecting to a computer does not exceed 1.8 meters in length, this is clearly not enough for comfortable work, so it will have to be lengthened. In principle, this is not a problem, in any computer store you will be offered such an extension cable (1, 3, 5 and 10 m). The first three work without any additional devices, but a 10-meter cable will already require additional signal amplification.
UPD: After several years of working with a cable 5 meters long, problems arose: when transferring a picture to a computer, the latter loses connection. I bought a 5 meter USB-3 cable and everything worked again.
The second, exactly related to Nikon cameras, the PTP connection mode must be enabled on the camera, in Russian - PTP, not Mass Storage - Data storage device, in the latter mode you are doomed to always see the camera as a USB flash drive. On Canon cameras, the situation may differ, for example, 5D MkII is always detected in the mode that suits us. So, if everything is connected, but there is no camera in the program, first of all, you should open the instructions and read about the connection modes.
Software setup
To get started, open Lightroom. Next, in the File menu, select File > Tethered Capture > Start Tethered Capture:
A dialog box will appear on the screen:
In this window, you can set the name of the photo shoot, specify the path to save the received photos, and add metadata and keywords. After the OK button is pressed, the program is ready to work. This is what Tether Capturing looks like in Lightroom:
As you can see, the program has determined the model of the camera and the settings set on it. Unfortunately, it is not possible to set the camera settings directly in the Lightroom program, but you can shoot remotely, which is already important, especially when you need to avoid "stirring".
Another nice bonus is that in the Lightroom program in the control panel, you can select a preset that will be automatically applied to the newly taken photo:
After everything is set up, you can take a picture:
And we immediately see the result. Here you can check the focus and make the necessary image settings.
As already mentioned, this connection method does not allow changing camera settings from a computer, which is not very convenient. You can solve this problem using Canon's native program - EOS Utility.
Let's start it up first. In the window that appears, select the item “Camera settings / Remote shooting”.
After that, the control panel will open, where you can change almost all camera settings. Move the mouse over the parameter you need, click and select the desired value. After you have set the necessary settings, take a picture. Damn convenient!
But in order to be really good, we need to make a little adjustment, as a result of which we can take pictures using EOS Utility, and the result is automatically transferred to Lightroom. To do this, go to the settings of the EOS Utility program, open the "Destination Folder" tab and specify the folder into which the captured frames will be moved.
Next, go to the Lightroom program, go to the menu File>Auto Import>Auto Import Settings. In the window that opens, specify the folder that Lightroom will monitor and pick up all the files that appear from it. We also choose the folder where Lightroom will save these files.
Important point! Do not forget to check the box next to "Enable Auto Import", otherwise auto-import will not occur.
If you did everything right, then when you press the shutter button, after a few seconds, the photo you took will appear in Lightroom.
That's all for today. And if you're interested, I can later show you how to capture from a computer using the Capture One software. Good luck!
Canon and Nikon Camera Control Software
DigiCamControl 2.0.0.
We present to your attention the free program DigiCamControl version 2.0.0 (developer Duka Istvan) for remote control of Nikon and Canon cameras (reflex cameras are fully supported). Despite the fact that this program is free, it has pretty good functionality. The interface is shown below:

In the top menu in the “File” tab there is an item “Settings”, where you can select the colors of the working window (theme), the interface language (Russian is present), settings for viewing photos, full-screen mode, set up keyboard shortcuts for quick control, and much more.
Initially, the program will be installed with an English-language interface, and if you are at a loss with Russification, then follow this path:
In the horizontal top menu, click the “File” button, then select “Settings”, the “General” settings window will appear, now it remains to select the Russian language “Russian” in the “Interface language” tab, click the “OK” button and restart the program so that you have made the changes have taken effect.
The main settings menu looks like this:

When you press the Live View button, a window will appear in which you can manage photo and video shooting, and your future photo or the frame from which you plan to start video shooting will be displayed on the screen. Camera settings are made remotely, that is, directly from the program you can adjust the white balance, select sensitivity (ISO), set the required shutter speed and aperture, etc.
The archive file contains an image of the program in msi format, after unpacking, simply run this file and follow the instructions of the installation wizard. The archive size is 60.3 Mb.
Fair, not too high or too low. There should be prices on the Service website. Necessarily! without "asterisks", clear and detailed, where it is technically possible - the most accurate, final.
If spare parts are available, up to 85% percent of complex repairs can be completed in 1-2 days. Modular repairs take much less time. The site indicates the approximate duration of any repair.
Warranty and Liability
A warranty should be given for any repair. Everything is described on the site and in the documents. A guarantee is self-confidence and respect for you. A 3-6 month warranty is good and enough. It is needed to check the quality and hidden defects that cannot be detected immediately. You see honest and realistic terms (not 3 years), you can be sure that you will be helped.
Half the success in Apple repair is the quality and reliability of spare parts, so a good service works directly with suppliers, there are always several reliable channels and a warehouse with proven spare parts for current models so that you do not have to waste extra time.
Free diagnostics
This is very important and has already become a rule of good form for the service center. Diagnosis is the most difficult and important part of the repair, but you should not pay a dime for it, even if you do not repair the device after it.
Service repair and delivery
A good service values your time, so it offers free shipping. And for the same reason, repairs are carried out only in the workshop of the service center: it can be done correctly and according to technology only at a prepared place.
Convenient schedule
If the Service works for you, and not for itself, then it is always open! absolutely. The schedule should be convenient in order to be in time before and after work. Good service works on weekends and holidays. We are waiting for you and working on your devices every day: 9:00 - 21:00
The reputation of professionals consists of several points
Age and experience of the company
Reliable and experienced service is known for a long time.
If a company has been on the market for many years, and it has managed to establish itself as an expert, they turn to it, write about it, recommend it. We know what we are talking about, since 98% of incoming devices in the SC are restored.
We are trusted and passed on complex cases to other service centers.
How many masters in the directions
If you are always waiting for several engineers for each type of equipment, you can be sure:
1. there will be no queue (or it will be minimal) - your device will be taken care of immediately.
2. You give Macbook repair to an expert specifically in the field of Mac repairs. He knows all the secrets of these devices
technical literacy
If you ask a question, the specialist must answer it as accurately as possible.
To give you an idea of what you need.
Will try to solve the problem. In most cases, from the description, you can understand what happened and how to fix the problem.
Tethered photography, or shooting with a connected computer, is a photographic technique that has been practiced by many professional photographers for many years. In short, tethering allows you to connect your camera to a computer or laptop and view digital images almost instantly on the device, seconds after shooting. Because of the cost and availability, "tethered shooting" has generally only been used by photographers who work hard in the studio and produce very high quality commercial shots. However, these technologies have become much cheaper and easier to operate, so they are now used by both professionals and amateurs.
If you've ever wondered about "tethered shooting" then this article will give you a quick overview of the process as well as some steps to get you started easily.
Photo Tyler Ingram
What is "tethered shooting"?
Tethered shooting is the process of connecting your camera to a computer, laptop, or even smartphone using a cable or wireless app. After the devices are successfully connected, all images taken by the camera are immediately sent to the computer and saved to a predefined folder. You can then see the full size image on your computer screen and even do some post-processing.
Advantages « shooting on the leashes»
The main advantage of "tethered shooting" is the ability to quickly view the image on a large monitor in a few seconds after shooting. This allows you and your client to examine the image on the big screen and make the necessary corrections if needed. Depending on the device pairing software you're using, you may even need to do some editing. You and your client can see exactly how the subject is photographed and make sure your vision matches. In general, this kind of cooperation should lead to a better result.

Disadvantages of "tethered shooting"
The ability to view photos instantly has several drawbacks.
First, you or your client can get too hung up on small details while studying the image, and this will slow down the photo session. So it's important to meet your client's expectations and move forward at the same time without focusing too much on the details. Second, tethering can drain the battery of the camera and the connected computer. If your photo session will last longer than an hour, then you will need extra batteries and a power outlet nearby. Lastly, connection software can be finicky and refuse to work for no apparent reason, so you'll need a backup plan in case it fails.
What you need for "tethered shooting"
The traditional and most reliable way to connect a camera to a computer is to use a cable. There are many different cables and ports available, so which one to use will depend on the model of devices used. Some digital cameras with built-in Wi-Fi even offer wireless connectivity or remote shooting, but these are generally limited to use on a tablet or mobile device, not a laptop.
1. Very long (i.e. 4-5 meters) USB cable to connect the camera and laptop;
2. Software like Adobe Lightroom or Canon EOS Utility 3;
3. Optional - JerkStopper, to prevent accidental pulling out of the USB cable.

4. Optional – portable laptop table like Tether Tools’ Aero Table

Tether table Aero is a lightweight, durable aluminum platform that attaches to nearly every tripod or stand, turning into a handy table for a laptop or camera accessory.

To be clear, there are many programs for connecting a computer and a camera, but in this article we will look at two inexpensive and easy ways: Adobe Lightroom and EOS Utility 3.
Simple "tether shooting" withLightroom
The quickest and probably easiest way to get started with tethered photography is to use Adobe Lightroom's Tethered Capture feature. Follow these steps to set it up:
Step 1 - Connect your camera to your laptop
Connect your camera to your laptop using a USB cable. Then turn on the camera.
Step2 - launch Tethered Capture in Lightroom
Open Lightroom and go to File > Remote Camera Control > Start Remote Capture.
Step 3 – select settings
In the settings of the Remote Capture Options dialog box, you have the option to specify a Capture Name (such as "Remote Capture Test" by specifying photo titles, selecting file locations, adding metadata and keywords. Pay special attention to where your files will be saved so that you could find them later.
If everything is done correctly, a narrow control panel (highlighted in red below) for some of the remote shooting settings will appear on the screen, as well as a Library in which the remote shooting photos will be placed.

However, finding a camera for Lightroom is not uncommon. If you've followed all the steps above and are still seeing the notification shown below, then try to resolve the issue by first making sure your Lightroom version and your camera's firmware are up to date. Also, check if your camera is compatible with Lightroom remote shooting. Note: There are third party plugins for incompatible cameras like Fuji X-T1, do a search for your camera model and you may find a solution.
Finally, try a different USB cable and make sure it works. But if you're looking for a more stable way to shoot remotely, consider the other option below.

Reliable “tether shooting” withEOS Utility 3
If you are taking pictures with a Canon digital camera, take the CD that came with it and install EOS Utility 3 on your computer. When the camera is connected to a computer, you can use this software to control the camera remotely and take pictures. This method is much more reliable and stable than using remote shooting in Lightroom.