How to find unnecessary files on disk c. How to clean a disk from garbage
Read what cleaning Windows 7 means. When it should be done. All ways to clean the registry and junk files. Useful programs and simple instructions.
Even the most professional users have to clean their operating systems from debris from time to time. If you have installed it on your computer, you need to constantly monitor its status. Microsoft no longer releases regular updates for this version (only available basic packages security), so you will have to fix the work of the seven yourself.
Let's look at how you can quickly and without harm to the system clean Windows 7 and significantly speed up tasks.
Why does my computer freeze?
System freezes are always the result of user actions. The exception is those cases when the computer does not support the installed OS: the available hardware components cannot ensure the normal execution of the program code.
If immediately after Windows installations 7, everything worked fine and very quickly, but over time, frequent freezes began, programs began to turn off, and the system itself started very slowly, all this suggests that it was time to clean up unnecessary data and processes.
Freezes appear in the following cases:
- There are a large number of programs installed on your computer, half of which you do not use;
- Autoload Filled - in parallel with switching on operating system Other programs that you did not launch yourself also begin to work. Because of this the process Windows launch may take many minutes instead of just a few seconds;
- The system is infected with viruses. Malware can run processes in RAM that cannot be closed. As a result, the computer starts to get very hot and other programs run very slowly. Also, there is a danger of your personal data being stolen;
- The contents of your hard drive are cluttered with files that are no longer needed. This includes both temporary files created by the OS itself, as well as user documents, films, and a large number of photographs. There can really be a lot of them, because most users may not clear their PC memory for years.
How to get the system working
A comprehensive cleaning of your Windows 7 computer will help return the OS to normal operation. There are two ways to get rid of unnecessary data and processes:
- Manually using standard Windows services;
- By using special software to optimize the OS.
First, we recommend performing the simplest steps. As a rule, this is enough to return the system to normal. If you continue to encounter slow work, try installing third-party utilities. They will help not only free up disk space, but also clean the registry, analyze the operation of all system modules and fix errors.
Using the built-in Disk Cleanup utility
The first and easiest way to clean your computer from junk on Windows 7 is to work with the standard removal service hard files disk. It automatically detects and deletes temporary files, various error reports, thumbnails, Trash contents, and other system junk.
To get started with the Disk Cleanup service, follow the instructions:
- Open the My Computer window. It will show all available hard disks. By right-clicking on one of the elements, go to its properties window. Displayed here detailed information about free and occupied space. If you see that there is less than 20% of free space left (or less than 1 GB), you need to perform a cleanup. First of all, we recommend checking the status of the system drive C;
- In the properties window, click on “Clear”. The memory size analysis window will open;
- Next you will see a list of groups of files that can be deleted, as well as the amount of memory consumed. We advise you to check all the boxes and perform a disk cleanup.

This service is often very slow. All due to severe clutter of disk space. Do not cancel the action and wait until the removal is completed. As a result, you can free up several gigabytes at once.
Clearing temporary files
Temporary files are entries that are created by all applications that are launched. The computer will no longer need this data, so it needs to be deleted from time to time. To perform the procedure manually, you need to go to the root folder of drive C. Open “My Computer” and click on the drive icon.
Go to the path C:\\Windows\Temp. A directory can contain several hundred files. You can select all elements using the keyboard shortcut CTRLA. Then delete the contents and empty the Trash. Next, restart your computer and check if it runs faster.
Sometimes the Temp folder may not appear on the system. To do this, you need to enable its visibility:
- Go to the Start menu;
- Open the Control Panel window;
- Set list items to appear as Small Icons and find the Folder Options option. Open this window;
- Go to the “View” tab and in the list of additional parameters, mark the “Show” field with a marker. hidden folders", and also check the box next to "Display compressed and encrypted files";
- Save your changes and try to find the Temp folder again.

Uninstalling programs
Often the cause of insufficient space on drive C may not be temporary files, but many installed applications or games. If you leave unused programs on your computer, this will result in a pop-up window like this:

Follow the instructions to remove programs on your Windows 7 computer:
- Open the Start menu and click on “Control Panel”;
- In the window that opens, find the “Add or Remove Programs” field and click on it;
- Wait for the list of all software installed on your computer to load. This may take a long time, especially if the system is running slowly;
- To remove a program or game, click on the desired name and in the window that opens, wait for the process to complete.
Please note that using the list of installed applications you can analyze your work with the software. The “Usage” column displays the startup frequency (Frequently, Rarely, Never). With the help of this information, it will be easier for you to figure out what software should not be stored on the system.

If you are deleting a game, we recommend that you also check the Program Files folder on drive C. If, after uninstallation, a folder with the name of the game remains in it, delete it. Thus, developers often leave cached files and mission progress records in case the user decides to reinstall the software.
Fixing slow PC loading
The reason may also be the load on the RAM. After deleting data from the hard drive, we recommend moving on to working with the OP.
All processes that occur in RAM are regulated by the Task Manager. With this system utility, users can view a list of running processes and the programs that created them. Also, you can manage system startup and user accounts.
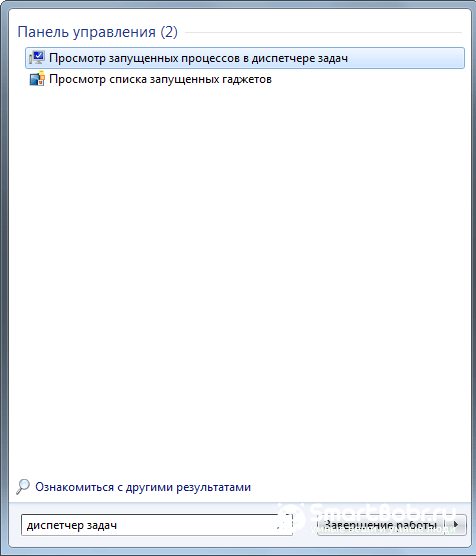
To launch Task Manager in Windows 7, open Start and enter the name of the utility in the search bar. The system will immediately display the result. Open the field as shown in the image below:
Another way to launch the Manager is to use the Run window. You can open it using the WinR button combination. Enter the TASKMGR command in the text field and click OK.

Startup Management
To edit the list of programs and services that are loaded with the OS, go to the “ ” tab. Uncheck the boxes next to the processes for which you want to disable autorun. This will not harm the system, because in Windows 7 the Task Manager does not display services that are important for the operation of the system. This means that you won't be able to kill a system process by mistake.
Removing it from Startup will not harm the program or game in any way. They will remain installed on the computer, they will only stop turning on when the desktop starts. In the future, you can enable the program yourself using its shortcut.

Closing unnecessary processes
If the computer turns on quickly enough, but after some time you start to experience severe OS freezes, check the running processes. In the Task Manager, open the appropriate tab and analyze which tasks are consuming a large amount of RAM. Close the most time-consuming objects by clicking the "End Process" button.
Utility Advanced System Care

Advanced SystemCare is a Windows 7 cleaning program that allows you to perform all system optimization options in one window, from deleting files from the hard drive to adjusting RAM.
A special feature of the application is its ability to monitor system performance in real time. The utility identifies errors and allows you to eliminate them in a few mouse clicks.
The application interface is divided into several tabs:
- Speed Up – This built-in service allows you to speed up your computer. In simple words, the utility removes unnecessary processes from RAM, thereby speeding up the operation of the system at the moment;
- Protect is a protection module. With it, you can scan the OS for virus software and remove all found ones. malware. Also, Advanced SystemCare will be able to check the reliability of the EXE files that are launched. A notification about the threat will appear in the tray;
- Clean&Optimize is the main and most functional tab. By clicking the Scan button you will start the service hard checks disk, system registry, Startup. As a result of correcting errors, all garbage will be removed from the system, shortcuts will be corrected, the registry and RAM will start working normally (without erroneous records and processes);
- In the Toolbox tab you can buy additional tools to monitor system performance;
- Action Center allows you to set the next time your computer is scanned for errors.
A tweaker is a special utility for viewing and editing all hidden functions of the system. As a rule, developers hide these functions so that the average user does not delete important settings by mistake.
The Red Button interface is completely Russified and very easy to use. All tabs are conveniently divided into the main modules of the computer - CPU and RAM, hard drive, detected junk files and data for cleaning Windows registry 7.
Go to each tab one by one and check the box next to the actions you want to take. Using each of these actions will speed up your overall performance. To apply the changes, click on “OK” in the lower right corner.
AusLogics Boost Speed – increasing PC performance

AusLogics Boost Speed is another one good program for cleaning Windows computer 7. Its features:
- Quickly scan the system and fix fatal errors;
- Shows hardware failures of the processor and connected buses;
- Built-in Assistant. With its help, you can quickly decide which files need to be deleted and which ones should be left alone;
- Browser protection and acceleration. Often the cause of slow Internet is not connection problems, but a cluttered browser. The AusLogics Boost Speed utility will clear the cache, cookies and improve the speed of loading pages in the browser;
- Acceleration in real time. With the press of one key, you can close all unnecessary processes and unused applications.
Disk Cleaner to clean up disk space
The task of Disk Cleaner is to optimize Windows 7 by cleaning junk files and records on the hard drive. Unlike the standard cleaning utility, this cleaner will help detect all hidden folders that are inaccessible to the average user.
Among the features of the program, it is worth highlighting the effective detection of registry errors, useless files and incorrect shortcuts. Also, the system analyzes how each problem affects the speed of Windows.
By pressing the “Fix” button, the built-in assistant is launched, which independently corrects the system without user intervention. After using the utility, it is recommended to restart your computer.
Results
It is recommended to start cleaning garbage in Windows 7 with a standard utility for deleting temporary files from your hard drive. If this does not help speed up the work, we recommend that you resort to help third party software. Before starting the installation of any utility, do not forget to scan its installer with an antivirus.
Which of the programs mentioned above helped you clean Windows 7? Write your options useful applications that may help solve the problem.
Computers are devices of fine technical and software organization. One of the conditions for their functioning at 100% of their existing potential is, naturally, cleanliness and order both inside and outside the system unit, and directly in the sections hard drive. If you do not systematically clean your PC from dust, dirt and “digital debris,” sooner or later trouble will happen to it. It will begin to “slow down” and “glitch” or fail altogether - it will stop starting.
This article will help you clean up your C drive. necessary files manually and through special programs.
How to remove unnecessary files manually?
Empty the trash!
Everything is earlier in Windows deleted folders and the files are stored in a special directory called “Trash”. It performs the same functions as a trash can in a house or apartment - all the trash is thrown into it. You can restore data that you deleted from this software reservoir at any time.
However, if the “Trash” only stores everything unnecessary, it must be emptied. Because recycled “digital trash” continues to occupy system partition space. Why waste it? Still, it’s better to spend free megabytes (or even gigabytes!) on useful program or a game. Agree.
To empty the Trash, do the following:
1. Right-click on the “Recycle Bins” shortcut on your desktop.
2. From the contextual set of options, select “Empty Trash.”
"Cleaning" in Windows directories
During operation of the operating system, so-called temporary files accumulate in its folders. After a one-time using Windows or some other program turns them into “ballast”.
To get rid of them:
1. Press the key combination - “Win” and “E”.
2. Right-click on the “Disk C” icon.

3. In the system menu, click “Properties”.
4. In the new window, on the General tab, click Disk Cleanup.

5. Wait a moment. The system utility needs to analyze the directories before deleting files from the disk.

6. Check the boxes next to the items that need to be deleted (“Magazine”, “Sketches”, etc.).
7. Click the “Clear...” button.

Upon completion of the procedure, you can also remove the saved OS restore points and thereby further increase the free space of the system partition. This is done like this:
1. In the same window, go to the “Advanced” tab.

2. In the “System Restore…” block, click “Clean”.
3. Confirm deleting backup points: in the request message, click “Delete”.

Attention! After running the command Windows utility deletes all existing restore points except the last one.
What's going on in the Temp folder?
The Temp folder also serves as storage for temporary files. Many programs and the operating system itself place their elements in it during various operations (unpacking archives, updating, installation, etc.).
You definitely need to visit Temp regularly and clean out all its contents. It can store not only temporary files, but also viruses. A huge number of digital “strains” are placed here after a successful attack on a PC.
To clear Temp:
1. Open the folder. It is located in the directory:
Drive C → Users → → AppData → Local
2. Press the combination “Ctrl+A” to select all files and folders.
3. Click the right mouse button. Select "Delete".

Have you been on the Internet? Clean up your browser!
After visiting sites, a fairly large amount of information, including confidential information, is stored in the cache (special storage) and browser log. Naturally, it also reduces the precious free megabytes of the C drive.
Therefore, make it a rule to clean your browser after finishing web surfing (working on the Internet). This procedure will not take much of your time - only 1-2 minutes, no more!
1. In almost all popular browsers (Opera, Google Chrome, Firefox) cleaning is launched by the hot key combination - “Ctrl + Shift + Del”. Click them simultaneously while in a web browser window.

2. In the settings of the panel that opens, specify that you need to delete the data that was saved for the entire period of using the browser. Also check the boxes next to the objects that need cleaning.
3. Click the "Clear history" button.
Get rid of unnecessary applications
Some users, especially beginners, experience “Plyushkin’s disease” during the process of selecting and installing programs and games.
Whatever they come across on torrent trackers, websites dedicated to software, and other Internet sources, as well as on disks and flash drives borrowed from friends and acquaintances, they are sure to install on their PC. And at the same time they are guided by the same thought as the well-known literary hero: “I’ll take it, keep it, it’ll come in handy someday.” As a result of this approach, computer clutter occurs almost exponentially.
To neutralize from Windows unnecessary game, utility, follow this guide:
1. Click Start (the first icon on the left at the bottom of the display).

2. In the pop-up panel, click “Control Panel”.
3. In the “Programs” section, click “Uninstall...”.

4. Left-click once in the list on the program you want to get rid of.

5. Click at the top (above the list) the “Delete” option.
6. Follow the prompts of the uninstaller that opens to neutralize the software from the computer disk.
Advice! You can also open the uninstaller in another way: Start → All Programs → folder of the application to be removed → Uninstall file, or Uninstaller (or in Russian - Delete, Uninstall).
How to remove applications installed with the system?
Browser Internet Explorer, Notepad application, games (Klondike, Solitaire, etc.) and others integrated into Windows applications it cannot be uninstalled using the method described above, or using special utilities. They can only be disabled - make sure that they are not displayed in the operating system.
1. Open: Start → Control Panel → Programs → Programs and Features.
2. In the window that opens, in the list on the left, click the last item - “Turn on and off components...”.

3. Uncheck the box next to the component that you want to remove (for example, Games → Mahjong).
4. Click OK. Wait until the operation completes.

Automatic removal of unnecessary files
Cleaner programs
This category of software is designed to help you clean up your system partition in a matter of minutes. Using special algorithms, these utilities delicately remove all existing “software obscenities” from the registry, OS directories, browsers and other applications.
Let's look at the most effective solutions.
Accurately detects and neutralizes temporary, unnecessary folders and files from drive C (Temp folder, thumbnail cache, memory dumps, system log). Correctly cleans browser directories (cache, cookies, browsing history, saved passwords and logins) and other trusted applications (WinRAR, Nero, Google panel, etc.). Brings order to the registry: checks its integrity, eliminates errors in “branches”.

One of the most powerful utilities for optimizing the OS and cleaning drive C. It efficiently cleans system folders and eliminates problems in the registry. Provides the user with the ability to comfortably manage startup, scheduled tasks and uninstall useless applications. It has special settings for selective cleaning.

The most convenient tool for global and selective cleaning of the system disk. Uses more than 90 removal algorithms unnecessary objects. Highly optimizes the registry, startup, and general OS settings. Able to perform detailed monitoring of consumed system resources in real time. Very easy to operate.
To use nCleaner:
1. In the utility window, click the “Clean System” section.

2. To clean the directories on drive C, in the “Clean system...” block, click the “Clean Now” button.

To fix errors in the registry, click the same button, but in the “Registry clean...” block.
3. Upon completion of the analysis of the selected objects, click “Remove”.

What to do with unnecessary drivers?
Of course, delete it. If a device is no longer on the PC, for example, a video card, hard drive, webcam, then, accordingly, its driver is not needed.

To solve this problem, it is best to use specialized utilities. For example, Driver Sweeper. This tiny program is indispensable when you need to find out which drivers are installed in the OS and remove unnecessary ones. It has additional useful features(registry cleaning, backup and etc.). Equipped with a multilingual interface.
Uninstaller programs
These maintenance utilities uninstall programs and games in a semi-automatic mode. They find and run the uninstaller for the specified application, and then, upon completion standard removal, release system partition from the remaining elements of the deleted application.
Let's look at the most popular uninstaller utilities on the Internet.
A worthy alternative to the system applet responsible for uninstalling software. Endowed with advanced functions, carefully analyzes directories. Finds all remnants of programs in folders and the registry. Equipped with an easy to use control panel.

It analyzes the disk and cleans it from “digital garbage” at lightning speed. Neutralizes objects from folders and the registry without interfering with the performance of the system and programs.

Solution from Chinese developers. Endowed with powerful algorithms for scanning system objects. Has the Force Scan function.

How to delete undeletable files?
If you have not yet encountered a situation where an unnecessary file “does not want” to be deleted, you will definitely encounter it in the future. This occurs because the object being deleted is being used by an application or driver.
Such problems are also resolved with the help of special utilities. Here are some of them:
Has a tiny size. Integrates into the OS context menu. Tells the user which specific process is blocking the application. Correctly removes files in directories. Operates with just a few mouse clicks.

Can remove a large number of file locks related to user rights, access and security. Instantly terminates all blocking processes and safely sends the selected item to the trash.

It is protected from inappropriate use: it does not delete files without which the system cannot work and in which confidential user data is stored. Effectively removes locks and deletes files of almost all categories.

Beware, memory eaters!
Windows, by default, reserves system partition memory for its special files. They can have a fairly substantial volume - 4.7, 10 GB or more. But if there is no need for these files, or rather for the functions that they support, of course, it makes sense to remove them. Who wouldn't mind another 5-10 free gigabytes on drive C?
Pagefile.sys
The swap file is a kind of software reservoir for PC RAM. It temporarily stores data that the RAM cannot accommodate. But if you have powerful computer with RAM of about 6-8 GB, then this file can be removed by disabling the special option.
1. Go to: Panel → Control Panel → System and Security → System.

2. Click " Extra options... " In the properties panel, click "Options" in the "Performance" block.

3. Go to the “Advanced” subsection.
4. In the block " Virtual memory» click "Edit".
5. Uncheck the “Automatically select...” option.

6. Click the radio button “No paging file”, click “OK”.

Advice! To reduce the size of pagefile.sys., click “Specify size” and enter the file size in megabytes in the “Initial ...” and “Minimum ...” fields.
Hiberfil.sys
IN this file Data is saved when the PC goes into a special “Sleep mode” - hibernation. If you do not use this option, do the following:
1. Open Start. In the search bar, type - CMD.
2. Run the application that appears in the panel with administrator rights.

3. Enter the directive - powercfg.exe /hibernate off
4. Press "Enter".

You can also disable hibernation through the “Run” panel (launched by the “Win + R” combination). Type in its line - powercfg –h off and click “OK”.
Successful Windows cleaning!
During the operation of a computer with the Windows operating system, various data invariably accumulates on drive C. This data includes installed programs, files on your desktop, saved documents, and temporary files. As a result, a situation may occur where . This leads to the fact that the operating system and installed programs cannot properly save their settings, temporary files and work results. This, in turn, leads to the fact that the computer begins to slow down greatly and it becomes almost impossible to work on it. In this article we will talk about how to get rid of unnecessary files and free up disk space.
Step #1: Clean your desktop.
If you want to clean up your C drive, the first thing you need to do is clean up your desktop. All files that are on your desktop are physically located on drive “C”. Therefore, moving files from the desktop to another drive (for example, drive D) will immediately free up a lot of occupied space on system disk.
Step #2: Check the C drive.
Sometimes, in order to clean the C drive, it’s enough to look at what’s saved on it and transfer it user files to another disk. Carefully inspect the folders on drive C. If you find folders or files that are not part of the operating system or installed programs, then you can transfer them. For example, it’s not uncommon to find a Downloads folder on drive C, which is used by various download managers.
You also need to look at which folder your browser downloads files to. For example, downloads files to the C:\Users\User\Downloads folder. Check this folder and move its contents to another drive.
Step No. 3. Use the Disk Cleanup function.
Operating room developers Windows systems foresaw the need to clean up the C drive and created the corresponding function. Open “My Computer” and right-click on the C drive and select “Properties” in the window that opens.
After this, the “Properties” window will open in front of you. Here you need to click on the “Disk Cleanup” button.

After clicking on the “Disk Cleanup” button, the operating system will analyze the files on drive “C” and offer a list of files that can be deleted without harming the operation of the computer.

You must check the boxes next to the files you want to delete and click on the “OK” button. After this, the system will warn you about deleting files and clean up drive C.
Step #4: Remove unused programs.
If the previous steps are not enough for you and you still don’t know how to clean the C drive, then you can remove programs that you rarely use. To do this, open (or the Start screen with tiles if you are using Windows 8) and search for “Add or remove.” After that, run the Add/Remove Programs program. You can also run this tool through the Control Panel (Control Panel - Programs - Programs and Features).

After this, a list of installed programs will open in front of you. In order to remove the desired program You need to right-click on it and select the “Delete” menu item.

Step No. 5. Other ways to clean up drive C.
There are also more radical ways to clean drive C. They are recommended to be used only as a last resort:
- Disable hibernation mode. uses space on drive C. By disabling this feature you can save several gigabytes of space. To do this, open command line with administrator rights and run the command powercfg.exe -h off.
- Disable System Restore. System Restore also uses up system disk space. In order to clean up drive C, you can disable this function. To do this, go to: Start - Control Panel - System and Security - System - Advanced system settings - System Protection tab.
Sooner or later, the computer owner may be slightly disappointed. It's quite disappointing to discover that HDD suddenly it becomes completely overloaded, as the system itself actively declares. It’s even sadder if it’s the system disk that is overloaded.
When the hard drive is overloaded, it needs to be cleared of junk files
In this case, you don’t have to be surprised at all why the computer began to work slower, why it freezes and slows down quite often. If you also encounter this problem, then you need to help your computer get rid of unnecessary junk. Cleaning the hard drive or a separate disk space on it helps with this.
To successfully cope with such a task, an experienced user will need only a few minutes. For a beginner, such a task seems overwhelming and difficult to complete. However, this is only a prejudice arising from ignorance. It will continue until the beginner studies the instructions on how to clean the hard drive on Windows 7.
There is a lot of unnecessary stuff stored in the “Temp” folder, which is what you should clean out. To open the “Temp” directory, launch the “Run” utility by pressing the “Win” and “R” keys simultaneously, enter “%temp%” in the white window, then press “Enter”.

After opening a new window, click the “Alt” key. Now, in order for you to be able to see the “garbage” that needs to be removed, it is important to display it, since it is hidden.
To display hidden files, open the “Control Panel”, find the “Folder Options” line, click on it. Now a new window will open, in which go to the “View” tab. There you will find a block called “Advanced Settings”.
In it, scroll the slider down to find the line “Show hidden files", check the box next to it, click "OK".
Now all hidden files will be visible, select everything you see and delete. Of course, if there are too many files, it is unreasonable to select one at a time, so you can optimize the process of performing such actions.
Click on any file, and then hold down two keys: “Ctrl” and “A”. After deleting the selected files, be sure to delete everything from the Recycle Bin. Now you can make sure that the hard drive was able to get rid of excess “garbage”.
By the way, by getting rid of temporary files, users often also quickly get rid of viruses, which often choose the “Temp” directory as their temporary refuge.
Removing system files
System files are important for correct operation Windows, so you can’t just delete everything without understanding what the file is intended for and what its meaning is. However, by following the instructions of experienced users, you can say goodbye to those system objects, which are not directly needed for the operation of your PC.
You can completely disable the page file. Open the “Control Panel”, find the “System” parameter, click on it, now on the left side of the window that opens, find the line “Advanced system settings”, click on it too.
Now a new small window will open, in which go to the “Advanced” tab. In the first “Performance” block, click on the “Options” button. After this, a new window will open again on the screen, in which you will also have to go to the “Advanced” tab.
In the lower “Virtual Memory” block, click on the “Change” button. In the window that opens, find the line “No paging file”, place a dot next to it and finally click “OK”.

Some users decide to delete the hiberfil.sys file. It is responsible for saving all settings when the computer goes into sleep mode. hiberfil.sys takes up a huge amount of space, sometimes reaching 5GB. Think carefully about whether it really matters to you that your computer starts quickly after waking up from sleep mode. If you are ready to say goodbye to hiberfil.sys, move on.
Launch the “Run” utility by pressing two “Win” and “R” keys at the same time, now enter powercfg-h off. Then the system will do everything automatically.
Alternative cleaning
If for some reason you would not like to use standard methods cleaning found in Windows, you can use others alternative ways, thanks to which the hard drive can also get rid of unnecessary “Garbage”.
You can download special programs that automatically clean disks, or you can use the BIOS.
Possibilities
When installing an operating system, you sometimes have to use it to set up the startup disk.
During the subsequent installation process, it is possible not only to completely remove everything from the hard drive, but even to format it.
Even if there are viruses hidden somewhere on the hard drive, and you couldn’t find them, you can easily get rid of them through formatting. At the same time, you will achieve the desired expansion of free disk space.
Experienced users can easily share how to clean a hard drive through BIOS. There is nothing complicated in this procedure, but you will have to be careful during the manipulations.
So, to carry out the formatting procedure through BIOS, make sure to purchase a boot disk or recovery disk.
Best to have boot disk, then you will be able to format the disk space through the BIOS, and then immediately install a new Windows.
Insert the boot disk into the drive, restart the PC, and during the next boot, press the “Delete” button; in some versions you have to press the “F2” or “F8” buttons.
Enter the BOOT section, set the boot option from the drive, after which a welcome message will appear, and then immediately install the operating system. The next step is to select the disk space that you want to clear through the formatting procedure.
Select the system partition by clicking on it; several action options will immediately appear below. You should select “Format”, the process will begin, in a few minutes the disk space will be as if new.

All subsequent actions will depend on your desire, you can continue the procedure Windows installations, or you can complete the process here, since you have already definitely achieved your goal. After some time, you can return to your PC and install the OS that you have now removed.
So, the process of removing unnecessary “garbage” and complete cleaning disk space is simple. You should only try once, test your skills in practice, and after a while you yourself will not notice that you have already become a pro in this matter.
Sooner or later system units and laptops become clogged with unnecessary unnecessary information. How to clear drive C of files and programs if you have already noticed that your computer is running much slower than in the first days of purchasing it?
Volume sometimes takes up more disk space than necessary programs and files. This affects the performance of the PC, it noticeably decreases, programs begin to take a long time to respond to given commands. Moreover, it is not at all necessary to constantly load your computer with games, applications, and files. PC disk space can become clogged from surfing the Internet without downloading unnecessary programs.
Do not rush to call a specialist, but check the disk space yourself. Right click:
1. Start,
2. Computer.

Find local disk(C:) and left-click on it, selecting “Properties” from the proposed list.
A window will open with a “general” tab, where you can view information about free and used space.

If the “Free” line indicates a small amount (less than 5 GB) of free space, then you need to clear the contents on the disk.
You need to start disk cleaning with the most popular folders:
1. Favorites,
2. Libraries.
Cleaning the Favorites and Libraries folder on the drive (C:)
Right click:
Start,
Computer.
Find the “favorites” folder, which includes the main subfolders: “downloads”, “desktop”; and additional ones, depending on the installed programs, for example, Yandex.Disk and other cloud services.
Now you can open one subfolder at a time and, without regret, delete all unnecessary files from there. The downloads folder can be completely freed because it stores information that is already on the computer. These are various archived rar and zip programs that have already been unpacked and installed on the computer. There are probably unnecessary shortcuts from them on the desktop. There are also old downloads that have long been deleted from the desktop due to uselessness.
Check the “desktop” folder in the same way. It contains everything that you are used to seeing on the monitor. You may have unnecessary files or folders there.
The remaining files: pictures, music and programs from the “Favorites” folder, which are used extremely rarely, but for some reason they are needed, it is better to transfer them to a separate disk, flash memory or throw them into any cloud space: Yandex.Disk, Mail cloud. This will free up a significant amount of disk space.
Now go to the “Libraries” folder and free up the subfolders as much as possible:
Video,
Documentation,
Images,
Music.
The remaining material can be transferred to a separate disk. The cleaner the drive (C:), the more productive the PC.
Take care of free space in advance so that it becomes less clogged in the future. You can transfer most of the subfolders from disk (C:) to (D:), which, as a rule, lies empty when the main disk space is completely full.
Subfolders: downloads, desktop - can be safely sent to disk (D:). Go to the properties of each subfolder, in the “general” tab, change their location from C:\Users\ADMIN\Downloads and C:\Users\ADMIN\Desktop to D:\.

Clearing the temp folder (Windows temporary folder)
In the temp folder different programs store their temporary files. “Temporary” in this case means that these files are unnecessary and can be easily cleaned. This folder needs to be cleaned periodically, because some programs delete their files, and some do not. Over time, the folder can become clogged with garbage and take up to 20 GB of memory.
The easiest way to clean your computer is to run special program. Today there are many of them, among them the most famous are Glary Utilites and CCleaner.
If there is no cleaning program and you don’t want to install it, clean it manually. To clean it, you need to go to the temp folder, which is located on disk (C:), but before that you need to close all running programs. Depending on your PC's operating system, choose one of the following:
For XP: “Start”, then “Run”;
For Vista and Windows 7: Start, All Programs, Accessories, Run.
In the line that appears, enter the command “%temp%” (without quotes), click “ok”.

A folder will open with a never-ending list different files. Delete everything, nothing bad will happen.
An even easier way to clean it is to click on the “clean disk” button. It is located in the “properties” of drive C, called up using the left mouse button.
Clearing cache
Modern browsers cache viewed Internet pages, that is, they store copies of them in memory. This makes sites you visit frequently load faster, so it's a convenient feature. Over time, memory becomes clogged, information about new pages is not cached, and this leads to slow loading sites. The internet seems to be slower than usual. To view photos or videos, you have to wait a long time for loading. All this data must be deleted.
Thanks to the cache clearing operation, you will delete copies of pages from old sites from there, where you will never return. True, along with caching of old pages, information about new ones will also be cleared. But it's not scary. Current sites will be saved in memory again.
The easiest way to clear the cache is to use the above CCleaner program. It is worth considering that when clearing the cache, information about logins and passwords is deleted if you overlook and do not uncheck the “logins and passwords” field.
The cache can be cleared in the browser itself. IN different browsers this is done in different ways. Let's consider everything.
Google Chrome browser
Sequencing:
1. Press Ctrl + Shift + Del simultaneously;
2. In the window that appears, select the files needed for cleaning;

3. Clear history.
Opera and Mozilla Firefox browsers
The command and actions in the two browsers are similar to those in Google Chrome.

Internet Explorer
1. Find “service” in the browser panel and click the mouse.
2. A menu will appear in which you need to find the lines “internet options”, “general”, “browsing history” in order.
3. Check the box and click “delete”.
Removing unnecessary programs and components
The method is suitable for experienced users, but since the computer can be restored from last point saving, a less experienced PC user can try.
Removing unused programs or games will free up a huge amount of space.
You need to choose:
1. Start,
2. Control panel
3. Programs, removal of programs.
A list of programs will appear. You need to analyze the programs and remove all that you have not used for a long time.
Not all programs remove their components when uninstalled, so you will have to manually go through the list and remove everything.
When analyzing each program, many are guided by the size of the files, deleting only large ones. Some programs do not show the size. This creates the false impression that it weighs zero kb and is not particularly in the way. It's better to remove it if you don't use it, because it can weigh several GB, or just slow down your computer.
It is advisable, after each deleted program and components, to immediately save control point. This will help you in case of removal of the necessary component - to return the state of the computer that was before, but not long ago. Otherwise, several hours of work on removing programs may go down the drain.
Expanding your computer's memory
To quickly clean up the disk (C:), if you don’t have time to think about each program, you can buy an additional terabyte hard drive and transfer everything to it.
You can also rent space from cloud services, transfer all available information to third party drive. Majority cloud storage They provide quite decent amounts of free memory absolutely free of charge.
For more convenient disk analysis, use free program WinDirStat or similar.
Thanks to it, you can scan your hard drive and find out what types of programs and files are and how much space they take up. If you are a torrent user, then with the help of WinDirStat you can easily see and get rid of unnecessary old movies and programs that lie on the disk like dead weight and take up terabytes. In addition, WinDirStat can show how much disk space a program takes up, even if this information was hidden from you.
If you have any questions, I will be happy to answer them in the comments.


