How to unlock desktop location. How to prevent desktop changes
Every user has their own confidential folders and files on their computer that they would like to protect from prying eyes. For example, at home it is necessary to protect a child from information not intended for him, and at work, for one reason or another, it may be undesirable to show other employees some of your work materials. Well, besides, tell me, hand on heart, do you always calmly allow your colleagues to use your work computer or your household members to use your home computer? Hardly... And the reason here lies not only in the desire to limit access to confidential information, but also in the subconscious fear of losing your own materials due to the illiterate actions of other users - that is, for example, when your own child actively begins to master the art of working with files and folders with all the ensuing sad consequences for you. It is worth noting that the need to protect confidential information from prying eyes is relevant not only if such data is constantly stored on a work or home computer, but also when transferring it to other users via e-mail on either various media(CD/DVD disks, USB drives, floppy disks, etc.). It often makes sense to also think about protecting folders and files of the operating system and applications from changes, deletion or movement in an unknown direction, which is often managed by insufficiently prepared users. If this is your case, then it is wiser to hide such folders altogether, say, from the eyes of household members, and this action alone can significantly extend the performance of your computer, since hidden folders can be used in the usual way (for example, by running application programs from the Start menu), but you won’t be able to delete them, rename them, or move them. As for confidential information, it is better to block it - blocked folders will be inaccessible either for viewing or editing, and therefore the documents contained in them will be reliably protected from any changes. If you don’t want other users to be aware that some information is being hidden from them, then you should combine blocking with hiding. Well, if this doesn’t seem enough to you, then no one forbids you to also encrypt the most secret materials.
Protect folders and files with built-in Windows tools
Theoretically, you can hide your folders and files using the built-in Windows features- to do this, just enable the “Hidden” attribute in the properties of the corresponding objects. Folders and files hidden in this way will not be visible in Explorer to other system users, but only if the “Do not show” checkbox is enabled in the properties of the parent folders containing them hidden files and folders." In principle, this may be enough to protect your data from the most unprepared audience. However, objects hidden in this way will be visible in applications that do not use a standard dialog for displaying files and folders (FAR, Total Commander etc.), therefore such protection is more than unreliable.A more reliable option for data protection built-in using Windows is to use the EFS encrypted file system (Encrypting File System, EFS), which allows you to encrypt files by enabling the "Encrypt contents to protect data" option for them in Explorer (Properties > General > Advanced). It is impossible to read files encrypted in this way without knowing the password, but the EFS system allows you to protect folders and files only in file system NTFS.
Therefore, to protect personal folders and files, it is much better to use specialized utilities. These solutions will allow you to more securely hide folders and files (they will not be visible if you disable the "Do not show hidden files and folders" checkbox), as well as block access to them and even encrypt the data itself.
Programs for hiding, blocking and encrypting folders and files
There are a lot of programs on the market for hiding/encrypting folders and files, and the level of protection implemented in them differs markedly. Some solutions only provide for hiding folders and files and/or blocking them (it happens that similar options are available for disks). Others additionally support full file encryption (Table 1), which ensures data protection even when downloaded to another operating system or installing the disk on another computer. We do not set a goal to identify the best existing solutions, since everything here depends on the tasks facing the user, but simply as examples we will give the most attractive, in our (obviously subjective) opinion, diverse tools. Here, by the way, it is immediately worth noting several nuances. Firstly, it is quite possible that by default protected data will be inaccessible to other users only during normal OS loading, and when booting Windows V safe mode(SafeMode) access to them will be open. This can be explained very simply: in a safe Windows mode loads only the drivers necessary for the system to operate, and skips all additional ones (including those responsible for hiding data), which leads to a similar result. So it is possible that to protect data in SafeMode, you will need to make some settings in the utilities (usually just enable the corresponding checkbox). Secondly, other users will be able to access hidden or blocked data by booting into another operating system if several are installed on the computer, but the protection program is configured in only one. There is another way - rearrange HDD with protected information to another computer as an additional one, boot into it, after which you can easily access the data. With external media (USB, flash, CD-RW, etc.) it’s even easier - just install them on another computer - and the protection is gone. However, in real life, quite often such protection (if, for example, we are talking about a hard drive, there is only one OS on the computer, and you know for sure that other users will not be able to connect it to another computer) may be quite sufficient. In addition, if you accidentally forget the password to the data (we all sometimes sin with this), then you will always have reliable way access them on another computer. Well, if you have top-secret materials stored in your arsenal, and the attackers who are eager to get to them are professionals, then you can’t limit yourself to just hiding or blocking the data - you need to encrypt it. Encrypted data cannot be read either when booted in SafeMode or when booted into another OS or on another computer. But if you manage to forget the password to the data, then you can safely “give up” on these top-secret materials - no one, including you personally, will be able to get to them.Table 1. Functionality of solutions for hiding, blocking and encrypting folders and files (click to enlarge)
Universal Shield 4.3
Developer: Everstrike SoftwareDistribution size: 1.86 MB
Spreading: shareware Universal Shield is a very convenient tool for protecting personal files, folders and drives (including network drives) by hiding and encrypting them (seven encryption algorithms are supported, including AES with a 256-bit key). It is possible to hide files that match a specific mask (say, C:*.doc). It is possible to set different access rules (read, write, visibility and delete), which allows you to choose a variety of combinations of parameters - for example, you can make files accessible for reading and writing and prohibit their deletion. This access option allows you not only to prevent the deletion of personal data, but also application files, which is often no less important. If no activity has been performed on the computer for a certain period, the data can be blocked automatically. For greater security, it is possible to use a special Stealth Mode, which hides all user-visible information about the installation of Universal Shield - the program shortcut on the desktop and in the Start menu, as well as the corresponding folder in Program Files. Access to the program in this mode is possible only by pressing a pre-agreed key combination. There is support for "trusted processes", which allows you to backup files, checking them for viruses and similar operations in a protected state. Access to program settings requires entering a master password. The demo version of the program is fully functional for 30 days, the cost of the commercial version is $34.95. You can protect data in two ways - using the wizard that automatically starts when you first load the program (then it can be activated by the File > Universal Shield Wizard command or the Wizard button ) or manually. If the choice is made in favor of the master, you will have to perform several operations sequentially. First, select a protection option - that is, indicate to the program whether the data will be hidden or encrypted, or whether it will have limited access options. And then, in two steps, the data to be protected is selected, during which you can not only explicitly specify it, but also use file masks. Protecting data manually is no more difficult - the Protect button and the File > Protect Object command are responsible for this operation. For example, by clicking on the Protect button, you will have to define the data type (disk, folder, file or mask) on the left side of the window that opens, and on the right side, specify the protected object itself on the disk and configure its protection parameters. Correction of the installed type of protection is made through the properties of the object (Properties button), and refusal of protection is done by simply deleting the object from the program window. Temporary removal of protection is carried out from the utility itself by pressing the Locked button or using hot keys (the latter is much faster and more convenient).
Securing your files by encrypting them requires a little more time and effort. First, in the same way as discussed above, the basic protection parameters are configured (the Protect button). And then the protected object that appears in the utility window is additionally encrypted (Encrypt button) indicating the encryption algorithm and password. Decryption is performed by clicking on the Decrypt button, and, of course, is impossible without knowing the password.
Additionally, Universal Shield allows you to restrict access to special Windows folders (My Documents, Favorites, Control Panel, etc.), protect the desktop from changes (so that users cannot delete, add or change shortcuts and icons on the desktop), restrict access the control panel and prevent the date and time on your computer from being changed. This can be done through the wizard, or by using the File > Security tricks command.
There is a cheaper, simplified version of Universal Shield, Lock Folder XP (1.38 MB; $24.95), which limits the ability to protect drives, folders and files to hiding them. In addition, this utility does not support trusted processes and the use of hot keys is limited (however, the main function of quickly enabling/disabling protection is present), as well as limited functionality in terms of regulating access to special Windows folders and system settings. Setting up data protection in Lock Folder XP is possible through a wizard or manually - in both cases you will need to determine the type of data to be hidden and indicate which, for example, folders you want to hide. The Locked/Unlocked button or pressing the Ctrl + Win key combination is used to temporarily enable/disable protection.
Folder Guard 8.1
Developer: WinAbility Software CorporationDistribution size: 3.29 MB
Spreading: shareware Folder Guard is a simple and convenient solution for restricting access to folders and files, as well as preventing access to a number of Windows settings. Restricting access to personal data is carried out by hiding it, setting read-only access, or blocking it. Hiding is implemented in two options - you can make folders and files hidden or assign folders as empty (Empty). In the second case, the folders will be externally visible, but when opened they will look empty, although in reality they will contain information - this protection option is reasonable in relation to standard Windows folders, the complete hiding of which will tell other users that the information on the computer is blocked, which is undesirable. Protected folders will not be accessible to other users of the system even when Windows boots in safe mode, however, for this you will need to enable the corresponding checkbox in the settings. Access to the settings of the program itself is provided only by entering the master password; in case you forget this password, there is a function for restoring it using the free Emergency Recovery utility. The ability to operate the program in Stealth Mode has also been implemented, in which its own shortcuts and files will be hidden. The demo version of the program is fully functional for 30 days, the cost of the commercial version depends on the license type: personal license - $29.95, business license - $59.95.
You can protect your data using a wizard that starts automatically when you load the program (of course, it’s easy to disable the wizard from starting), or manually. When working with the wizard, specify a folder with documents, determine whether to set a password for access to the folder, set the visibility option for the folder (visible, hidden or empty) and determine the level of access to it ( full access, no access, "read only"). To control the level of access to files of a certain type, the use of file masks is additionally allowed. When protecting manually, the procedure will be the same, with the exception that you will have to perform them yourself - first select the folder of interest in the program window, and then set all the required settings by clicking on the corresponding buttons in the program window (Read-Only, No Access, Visible, etc.) or by selecting the necessary commands in context menu. To remove the protection, you will have to perform the same set of actions, but in reverse order.
It is possible to set different restrictions for different users (the corresponding users will first have to be added using the Protect > User List command) - this is very convenient, since there will be no need to regularly remove protection in case of manual work on the computer. It is possible to configure a list of “trusted programs” (Protect > Trusted Programs) - that is, an antivirus, backup program, etc., which will allow you to carry out the corresponding operations without removing protection. The key combination Ctrl+G and the Toggle Protection button are responsible for switching from protected mode to normal mode. In addition to protecting folders and files, Folder Guard can also protect basic settings OS from adjustment (command Protect > Permissions). In particular, block access to the properties of the taskbar, Start menu and a number of other windows, prohibit saving display properties (if they have been changed), block changes to folder properties and settings Internet Explorer, do not show icons on the desktop. And also prevent changes in parameters critical to the operation of the system by closing access to the control panel and setting a series of bans: on access to system registry, adding/removing printers, using the Run command, etc. You can also hide it in My Computer, Explorer, and standard dialog boxes Open/Save certain drives and block burning of CD/DVD discs. Different users may have different sets of such restrictions.
There is a cheaper version of Folder Guard - MySecretFolder (1.35 MB; personal license - $24.95, business license - $3.95). This utility easier to use than Folder Guard, but its capabilities are limited to hiding and locking folders, and installed settings protection will be the same for all users. Setting up data protection in MySecretFolder is quite simple - you just need to specify a folder, select a protection option for it (hiding or blocking) and click on the Protect button. Temporary disabling of protection is carried out using the Unprotect button.
How to prevent desktop changes?
Master's answer:
There are cases when a person who is responsible for the PCs of other users needs to install the same screensaver for all desktops. The main condition for this is the impossibility of changing this picture. To do this, you need to use the Registry Editor.
Before you start editing registry keys, you need to create them backup copy. To launch Registry Editor, you need to open Start, then Run. The Start menu can also be launched using the Win + R combination. In a new window, you need to enter the Regedit command and confirm the operation. If you were unable to launch the application in this way, then select “My Computer” on the desktop, right-click on it and select “Registry Editor” there. It can also be launched using " Windows Explorer", to do this, go to the path C:\Windows\ and double-click the regedit.exe icon.
In the main window of the program you will see two columns, the keys are written on the left side, and their values are on the right side. In order to open a branch, you need to click on the “+” next to it. Now go to the path HKEY_CURRENT_USER\Software\Microsoft\Windows\CurrentVersion\Policies\ActiveDesktop and create new parameter named NoChangingWallpaper. To do this, right-click on an empty area on the right side of the programs and select New and DWORD Value. Now write the above name, press Enter and your parameter is created. Click on it twice and set one (1) as the value. Confirm the operation.
Now let's go back to the desktop. Go to background image settings. To do this, right-click on the desktop, select “Properties”, and then click on “Desktop” and try changing the picture. But the list with images will not be available to you. To return to the original desktop settings, you need to delete the NoChangingWallpaper parameter or change the value in it from “1” to “0”. To close the program, use the “File” menu, selecting “Exit” from it.
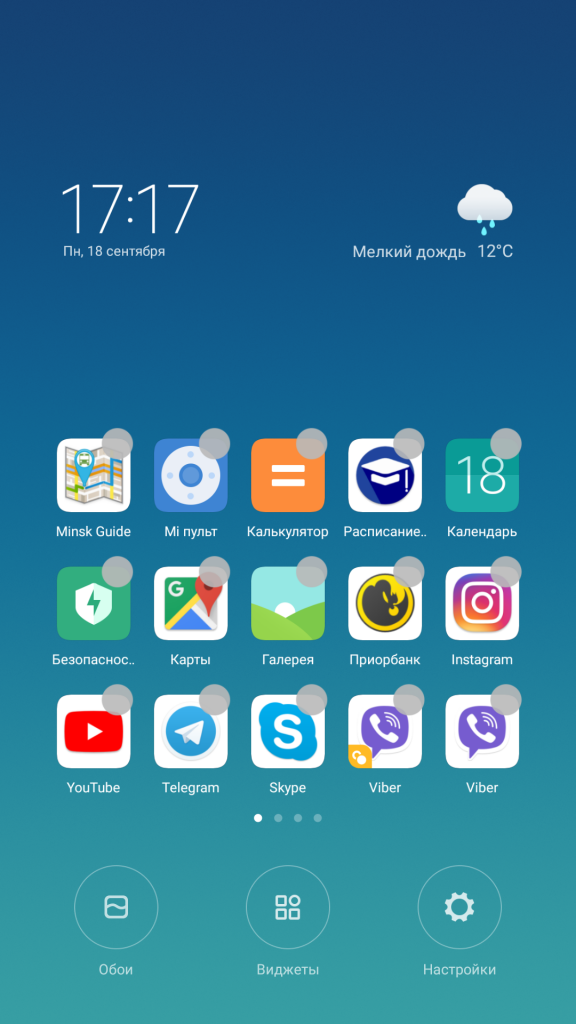
Xiaomi smartphones under MIUI control have a number of features that you can notice just by looking at the phone’s desktop. There's nothing familiar here Android users application menu - instead, there are many third-party working platforms that host all installed applications. This allows you to sort programs into folders and customize work panel for yourself.
Let's figure it out together!
*By the way, this instruction was written based on MIUI 9. In other versions of the shell, visualization and capabilities may differ.
In order to make desktop settings, you need to move two fingers to the center of the screen or hold down the “Menu” button. A menu will open with three shortcuts “Wallpaper”, “Widgets” and “Settings”.
In the “Wallpaper” section you can set a screensaver for your desktop: choose from one already existing on your smartphone or download it to your taste from Internet resources.

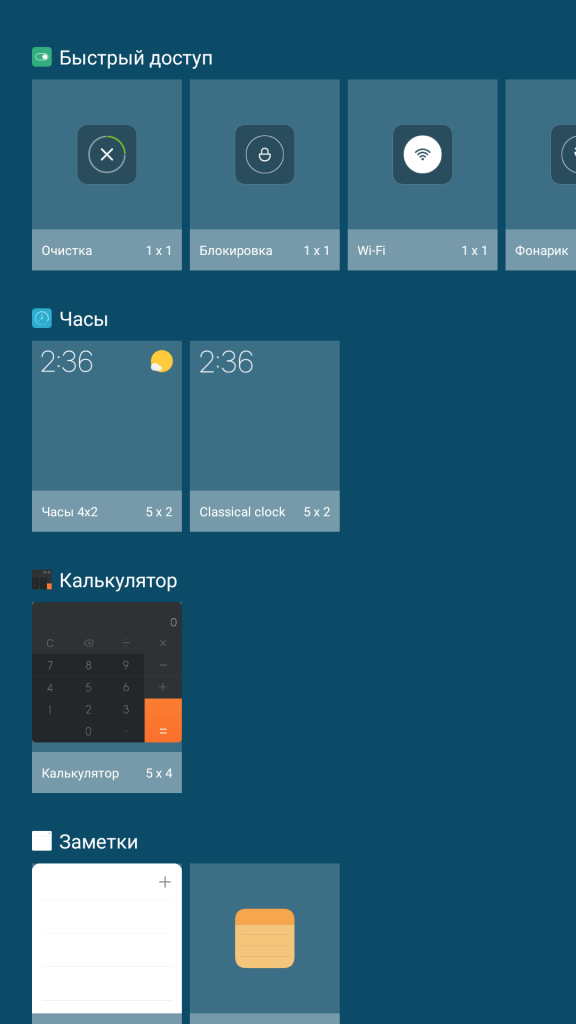
By clicking on “Widgets” we see a list of widgets (small independent software modules) that can be added to the smartphone’s desktop. Available as quick switches, and widgets from third-party applications.
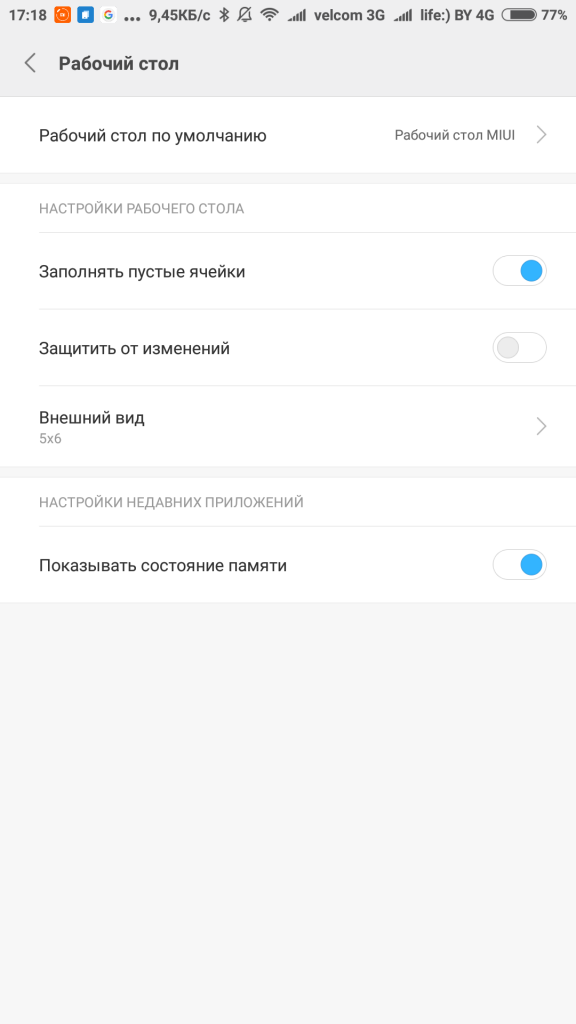
By going to Settings, you can find the following options:
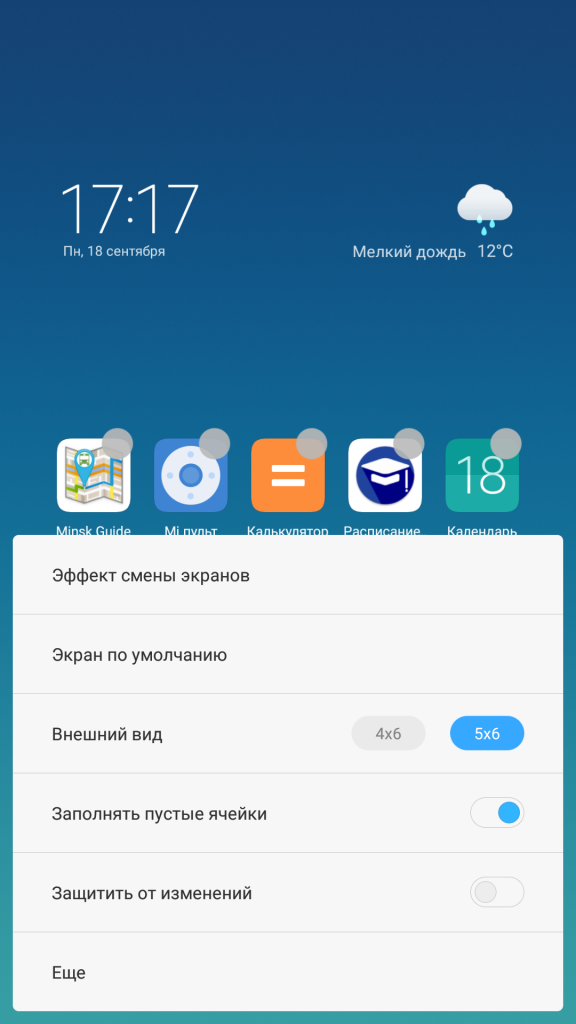
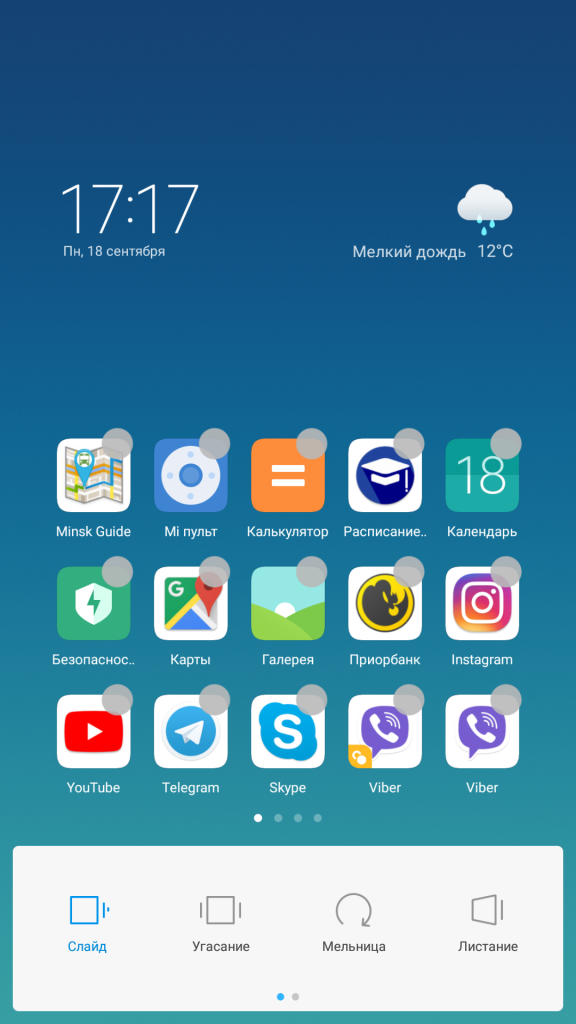
- “Screen changing effect” - setting animation when flipping between desktops. You can choose from 7 animations - “Slide”, “Fading”, “Mill”, “Flipping”, “Cascade”, “Rotation”, “3D cube” - the one that you like the most;
- “Default screen” - select the main desktop to which the smartphone will go when you press the “Home” button;
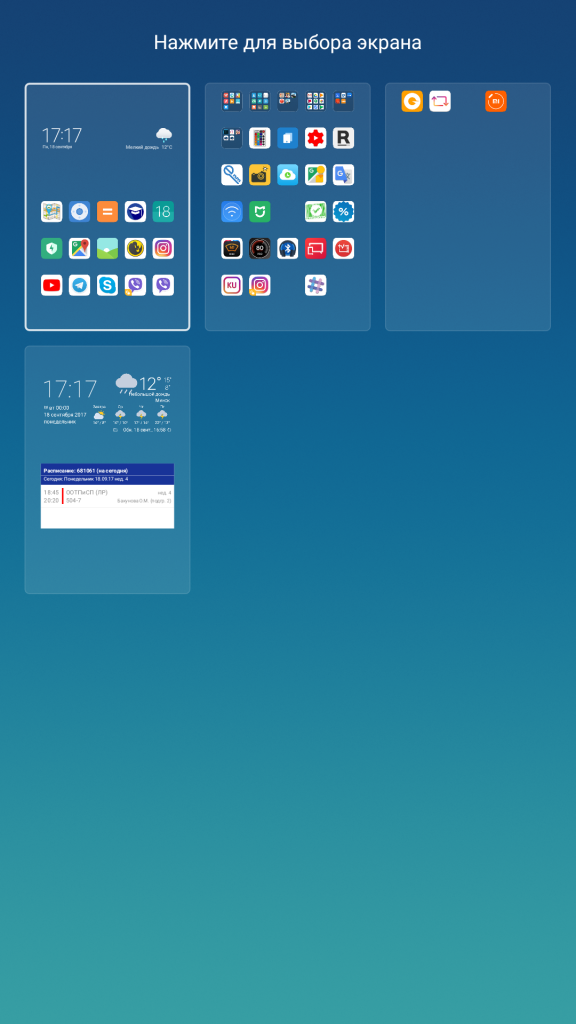
- In the " Appearance"You can set the number of cells on one desktop (“4x6” or “5x6”), but this function is not available on all Xiaomi smartphones;
- “Fill empty cells” - automatic filling function empty cells on the desktop;
- “Protect from changes” - this function blocks any changes (deleting/moving) on the desktop;
- “More” - will open a menu in the settings with all the possible changes that can be installed on the desktop;
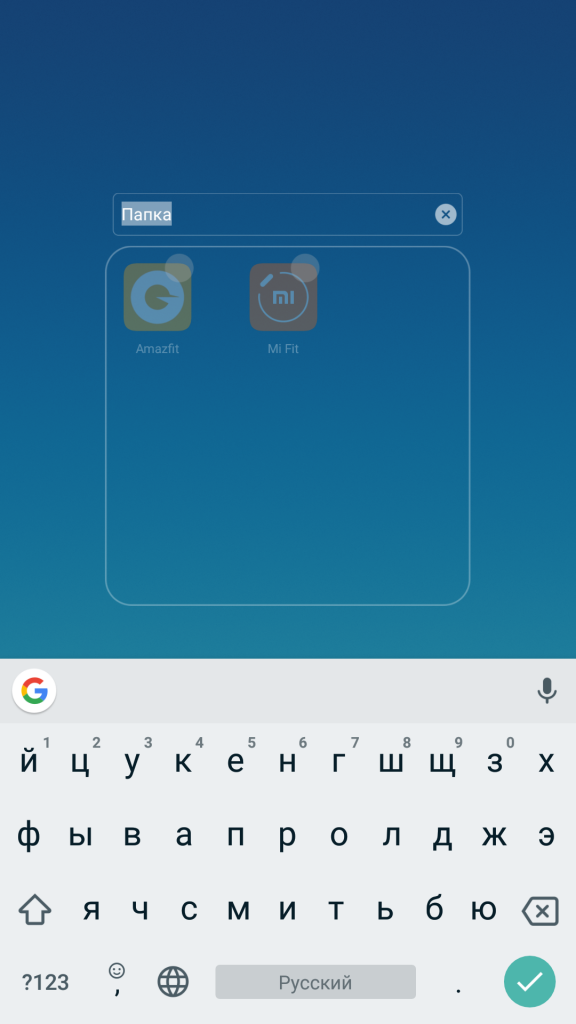
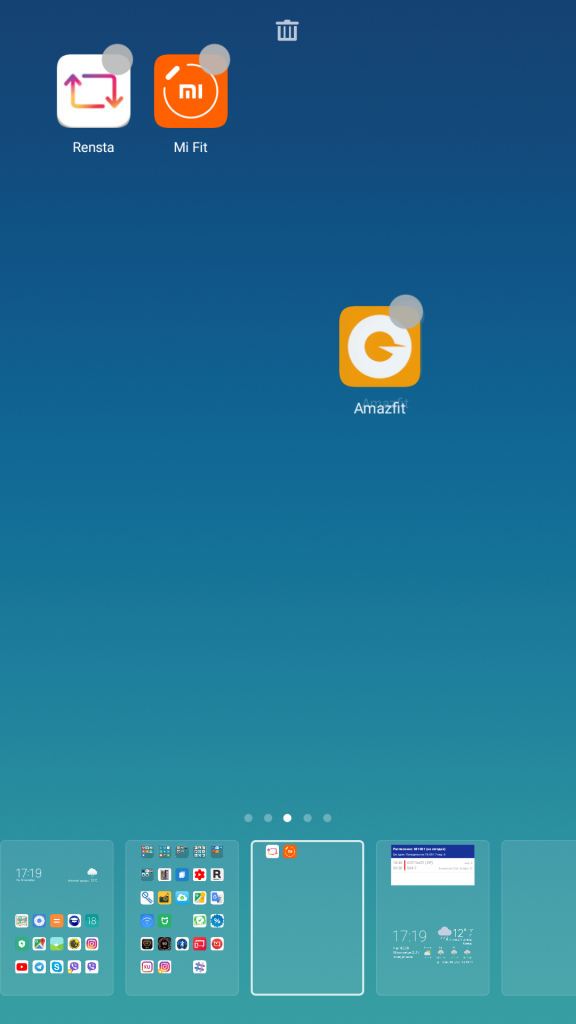
To combine icons into shared folder you need to hold one icon and point it at another. Do the same for any other shortcuts you want to add. You can also rename a folder - go to the selected folder, click on its name and change it.
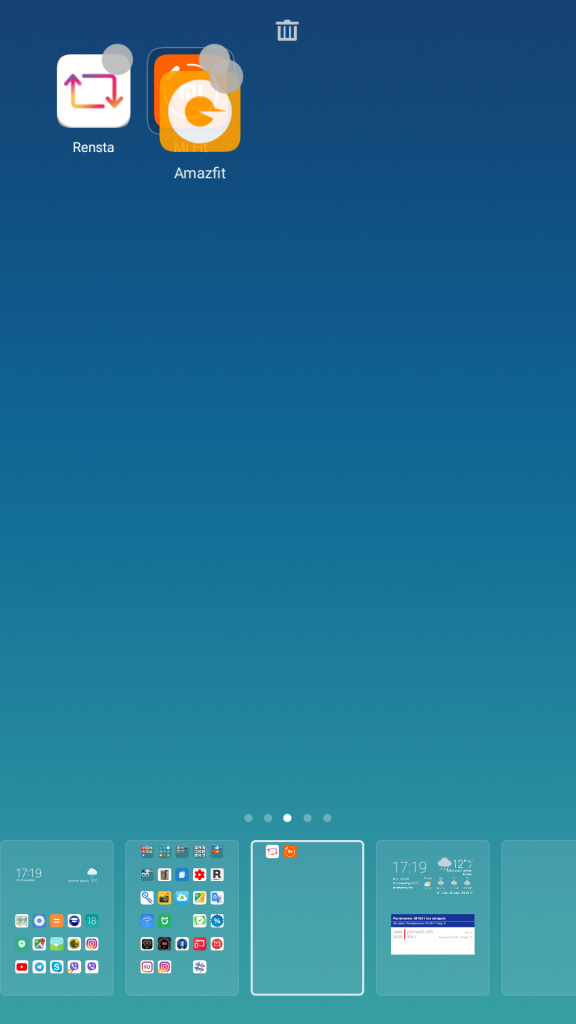
You cannot delete an icon without deleting the application itself; you can combine little-used ones in the same way as discussed earlier. The deletion itself is quick; just hold the application and drag it to the trash can icon, which appears at the top of the screen. Then we confirm the deletion by clicking on the “Delete” button.
Enjoy interesting facts and news with Xistore!


